

Note: This article contains affiliate links. If you click on these links and make a purchase, I may earn a small commission at no extra cost to you. This helps support my research and content. Read my full affiliate disclosure here.
Repair Snapshot
Use a mechanic if the driveshaft is heavily rusted, the yoke ears are damaged, the joint is seized in place, or your vehicle uses a staked-in or non-serviceable factory joint that needs special tooling. A shop is also the safer choice if you are not comfortable supporting the vehicle securely or diagnosing driveline vibration afterward.
This article is part of our Transmission and Drivetrain Maintenance & Repair Guides.
Replacing a worn U-joint is a realistic DIY job if you work carefully, keep the driveshaft indexed correctly, and press the bearing caps in without damaging the needle bearings.
A bad U-joint can cause clunking when shifting into drive or reverse, vibration at speed, chirping noises, and visible looseness in the driveshaft. Ignoring it can lead to driveshaft damage, loss of driveline power, or a shaft that drops while driving. The exact setup varies by vehicle, but the basic process is similar for many rear-wheel-drive trucks, SUVs, and some older rear-wheel-drive cars.
Before you begin, confirm the replacement joint matches your original part, read any model-specific torque specs, and inspect the driveshaft yoke and straps or flange hardware. If anything is bent, cracked, or badly worn, replacing the U-joint alone may not solve the problem.
Before You Start
Confirm the U-joint Is Actually the Problem
A worn U-joint usually shows up as driveline play, rust-colored dust around a bearing cap, a metallic chirp, or a vibration that changes with road speed. With the vehicle safely parked, transmission in neutral if appropriate, and wheels chocked, rotate the driveshaft by hand and check for play at the joint. There should not be noticeable looseness between the yoke and the cross.
Know Your Driveshaft Style
Many replaceable U-joints are retained with internal or external snap rings. Some original equipment joints are staked in from the factory and are harder to remove cleanly. Others use straps and small bolts at the differential end, while some use flange bolts. If your vehicle has a two-piece driveshaft with a center support bearing, the job may involve extra alignment and support steps.
Important Preparation Steps
- Park on a level surface and support the vehicle securely with jack stands under approved lift points.
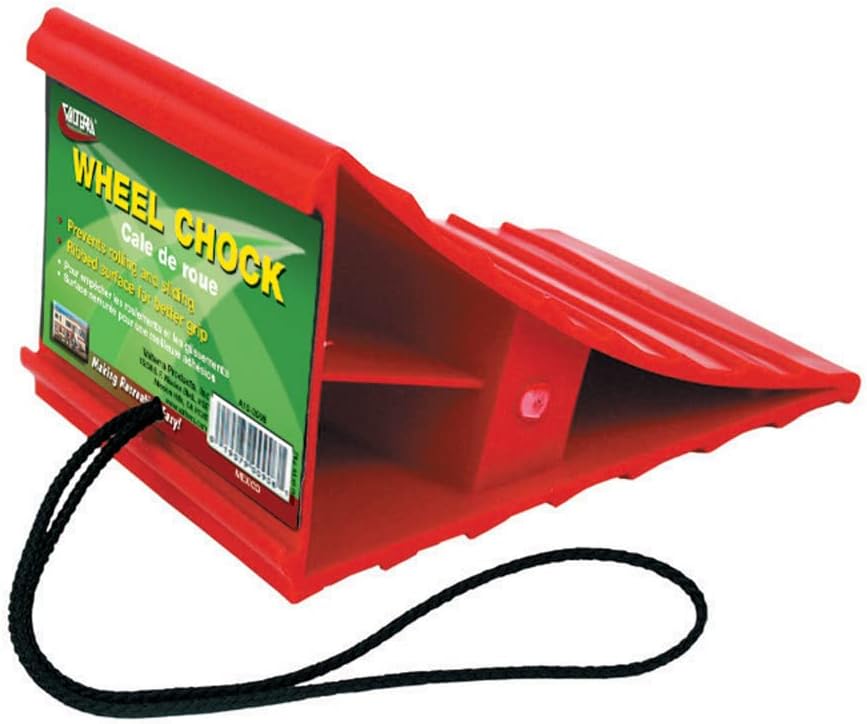
- Chock the wheels so the vehicle cannot roll while you rotate the driveshaft during removal.
- Use a paint marker to mark the relationship between the driveshaft and the pinion flange or yoke before disassembly.
- Check whether the replacement joint includes new snap rings, grease fitting, straps, or bolts.
How to Remove the Driveshaft
Mark the Shaft Orientation
Before removing any hardware, mark the driveshaft and mating flange or yoke so the shaft goes back in the same orientation. This helps preserve balance and can prevent a new vibration after reassembly.
Disconnect the Rear of the Driveshaft
Remove the U-joint straps, bearing cap retainers, or flange bolts at the differential end. Use the correct socket and apply steady force to avoid stripping small bolts. Keep one hand on the shaft as the last fastener comes out so the bearing caps do not drop off unexpectedly.
Lower the Shaft Carefully
Once the rear joint is free, lower the rear of the driveshaft and slide the front slip yoke out of the transmission or transfer case if your vehicle uses one. Have a drain pan ready because some fluid may leak out. On flange-style front connections, remove the front hardware and lower the shaft fully.
- Wrap tape around any loose bearing caps if you are reusing the old joint temporarily for inspection.
- Do not let the shaft hang by one end if a joint is still installed.
- Set the driveshaft on a clean bench where dirt cannot get into the yoke bores.
How to Remove the Old U-Joint
Remove the Retaining Clips
Spray penetrating oil around the bearing caps and clips. Then use snap-ring pliers or needle-nose pliers to remove the retaining clips from the yoke. Some clips are under spring tension from rust and may need a light tap with a punch before they release. Wear safety glasses because clips can fly out suddenly.
Press the First Cap Out
Support the yoke in a bench vise or U-joint press with a large socket on one side to receive the cap and a smaller socket on the other side to press against the opposite cap. Tighten the vise or press until one bearing cap is driven through the yoke bore and into the receiving socket. If the joint is stubborn, stop and apply more penetrating oil or use moderate heat only if safe for your work area.
Remove the Cross and Remaining Caps
After one cap protrudes enough, remove it with pliers. Slide the cross toward that side, then press the opposite cap out the other direction. Repeat the same process for the second pair of caps if needed. Keep track of how the joint sat in the yoke so the new one goes in squarely.
Clean and Inspect the Yoke
Once the old joint is removed, clean the inside of the yoke bores and snap-ring grooves with brake cleaner and a rag. Light rust can be removed carefully with fine emery cloth, but do not remove metal aggressively. Inspect for cracks, distorted ears, deep corrosion, or grooves that will not let the new clips seat fully. If the yoke is damaged, replace the driveshaft or yoke as needed.
Tools That Make This Job Easier


How to Install the New U-Joint
Prepare the New Joint
Compare the new U-joint to the old one for cap diameter, width, and clip type. Remove two opposite bearing caps carefully without disturbing the needle bearings inside. If even one needle falls over, the cap can crush during installation and the joint will bind or fail early. If your joint has a grease fitting, note the best orientation for future access before pressing it together.
Install the First Two Caps
Position the cross in the yoke and slide the first cap into place from the outside. Use the vise or press to drive it in just far enough to hold the trunnion. Then install the opposite cap and slowly press both sides until one snap-ring groove becomes visible. Install that snap ring, then press the joint back the other way until the opposite groove is exposed and install the second ring.
Repeat for the Other Axis if Required
If you are installing the joint through a second yoke section, repeat the same process on the remaining pair of caps. Work slowly and make sure the cross stays centered. The caps should seat without forcing. If a cap suddenly gets very hard to press, stop and check for a fallen needle bearing.
Check for Smooth Movement
Once all clips are installed, move the joint through its full range of motion by hand. It should pivot smoothly with no gritty feel and no obvious looseness. A slightly stiff new joint may free up after a light tap on the yoke ears with a brass hammer, but it should not bind. Binding usually means a cap is not seated correctly or a needle bearing is out of place.
- Never hammer directly on the bearing cap without proper support.
- Do not reuse damaged or stretched snap rings.
- If the grease fitting is removable, many installers wait to install it until pressing is complete to avoid breaking it.
Reinstalling the Driveshaft
Install the Shaft in Its Original Orientation
Lift the driveshaft back into place and align the marks you made during removal. If the front uses a slip yoke, slide it in carefully to avoid damaging the transmission seal. Then position the rear bearing caps squarely in the pinion yoke or flange.
Install Straps or Flange Hardware
Install the retaining straps, cap bolts, or flange hardware by hand first so the threads start cleanly. Tighten fasteners evenly and torque them to the vehicle manufacturer’s specification. This matters because U-joint strap bolts are often small and easy to overtighten, while undertightening can allow the caps to move and destroy the joint.
Grease the Joint if Serviceable
If your replacement U-joint has a grease fitting, apply the correct grease slowly until fresh grease begins to appear at the seals. Do not overfill aggressively, especially on small joints, because excessive pressure can damage seals. Wipe away excess grease so dirt does not collect around the caps.
Final Checks Before Lowering the Vehicle
- Verify all snap rings are fully seated in their grooves.
- Confirm the bearing caps are centered and not pinched by the yoke.
- Double-check all strap or flange fasteners with a torque wrench.
- Make sure no tools, rags, or drip pans are left under the vehicle.
Recommended Tools for This Job


Torque, Lubrication, and Adjustment Notes
There is no universal torque spec for every U-joint strap or flange bolt, so always use the specification for your exact vehicle. This is especially important on trucks, performance vehicles, and 4WD applications where driveline angle and hardware load matter. If your replacement hardware includes instructions, follow those unless the vehicle manufacturer specifies otherwise.
Most U-joint replacements do not require a bleeding procedure or electronic reset. However, some serviceable joints do require initial greasing after installation, and some driveline setups benefit from checking transmission or transfer case fluid if any leaked during driveshaft removal. If you removed a slip yoke and lost fluid, top off the fluid level according to the factory procedure.
There is also no normal adjustment for a U-joint itself. If you still have vibration after replacement, the cause may be incorrect driveshaft phasing, a bent shaft, worn pinion or transmission mount angles, a damaged center support bearing, or reinstalling the shaft in a different orientation.
Common Mistakes to Avoid
- Skipping alignment marks and reinstalling the driveshaft in a different position, which can create a new vibration.
- Letting bearing caps fall off the new joint and then missing a displaced needle bearing during installation.
- Pressing the caps too far and damaging the snap-ring grooves or yoke ears.
- Reusing worn straps, bolts, or clips when the new joint includes replacements.
- Ignoring rust, cracks, or distortion in the yoke that will prevent the new joint from seating properly.
- Failing to torque the retaining hardware to specification.
- Forgetting to grease a serviceable U-joint after installation.
How to Test the Repair
After lowering the vehicle, start with a short, low-speed test drive. Listen for clunks when shifting from park to drive or reverse, and pay attention to vibration under acceleration and at steady cruising speeds. A successful repair should eliminate play-related noises and reduce or remove the vibration caused by the failed joint.
After the test drive, crawl back under the vehicle and inspect the joint area again. Check for shifted bearing caps, loosened fasteners, fresh grease leakage from damaged seals, and any sign that a clip has popped out of its groove. If anything looks off, do not continue driving until it is corrected.
If the original symptom remains unchanged, inspect the rest of the driveline. Another U-joint, the slip yoke, differential backlash, wheel balance, or transmission mount may also be contributing to the problem.
Key Takeaways
- Mark the driveshaft orientation before removal so you can reinstall it in the same balanced position.
- Press the new U-joint in slowly and stop immediately if a bearing cap binds or a needle bearing shifts.
- Clean the yoke bores and snap-ring grooves fully or the new clips may not seat correctly.
- Torque strap or flange hardware to the exact vehicle spec because overtightening and undertightening both cause failures.
- If vibration remains after replacement, inspect the driveshaft, yokes, mounts, and driveline angles instead of assuming the new joint is defective.
FAQ
What Are the Signs of a Bad U-joint?
Common signs include a clunk when shifting into drive or reverse, vibration that increases with road speed, squeaking or chirping from underneath the vehicle, and visible looseness or rust dust around a bearing cap.
Can I Replace a U-joint Without Removing the Driveshaft?
On most vehicles, no. The driveshaft usually needs to come out so you can safely access the retaining clips and press the bearing caps in and out squarely.
Do I Need a Special U-joint Press?
A dedicated U-joint press makes the job easier, but many DIYers use a sturdy bench vise with correctly sized sockets. Extremely rusted joints may still require professional equipment.
Why Is the New U-joint Stiff After Installation?
A slight initial stiffness can be normal, but binding usually means a cap is not seated evenly or a needle bearing has fallen over inside one of the caps. The joint should pivot smoothly by hand.
Should I Grease the New U-joint Right Away?
If it is a serviceable greasable joint, yes. Add the correct grease after installation until fresh grease appears at the seals. If it is a sealed joint, do not try to add grease.
Can a Bad U-joint Cause Highway Vibration?
Yes. A worn U-joint often causes vibration that gets worse with speed or during acceleration. However, a bent driveshaft, wheel imbalance, or incorrect driveshaft phasing can cause similar symptoms.
Is It Okay to Replace Only One U-joint?
Yes, if only one joint is worn and the others check out. But if the driveshaft has multiple joints and one has failed from age or lack of lubrication, inspecting the others closely is smart because they may not be far behind.
What if the Old U-joint Is Staked in and Has No Snap Rings?
That style is more difficult to replace because the staked material must be removed accurately before the new joint can be installed. Many DIYers choose a driveline shop or experienced mechanic for staked-in factory joints.
Need Parts for This Repair?
The right parts and supplies vary by vehicle.
Select your make and model to find compatible parts and accessories for your car.
Exact Fit
Parts that fit your make and model
Quality You Can Trust
Top brands and OEM quality options
Fast Shipping
Get the parts you need, delivered fast