

Note: This article contains affiliate links. If you click on these links and make a purchase, I may earn a small commission at no extra cost to you. This helps support my research and content. Read my full affiliate disclosure here.
What You’ll Need
A quick look at the tools and supplies commonly used for this job.
Tools
Parts & Supplies
- Clean rags
- Mild soap and water in a spray bottle
- Absorbent pads or kitty litter for spills
- Replacement fuel cap if needed
This article is part of our Fuel System Maintenance & Repair Guides.
Inspecting a fuel tank for damage or leaks is mostly about working safely, finding the exact source of any wetness or fuel smell, and knowing when a tank is no longer safe to drive on. A careful visual inspection can reveal impact dents, rust-through, cracked plastic seams, loose straps, leaking filler necks, and seepage from hoses or the fuel pump module area.
Because gasoline vapors ignite easily, this is not a job to rush. You are not pressure-testing the tank with shop air or probing it with metal tools near sparks. Instead, you are checking the tank, its mounting points, nearby lines, and the filler area in a controlled way so you can tell the difference between a minor external issue and a serious leak that needs immediate repair.
This guide walks through what to look for, how to get a good view under the vehicle, what counts as a pass or fail, and when to stop driving and hand the job to a professional.
Safety Before You Start
Fuel system work always starts with fire safety. Perform the inspection outdoors or in a very well-ventilated area. Keep the vehicle away from water heaters, furnaces, welders, smoking materials, extension cords with damaged insulation, and anything else that can create a spark or open flame.
If you smell strong raw fuel, see dripping gasoline, or notice a puddle under the car, do not start the engine just to move it for a better look. Push the vehicle if necessary, or have it towed. A small seep can become a spray leak once the pump primes or fuel sloshes inside the tank.
- Let the exhaust cool completely before working underneath the vehicle.
- Wear safety glasses and gloves because fuel can irritate skin and eyes.
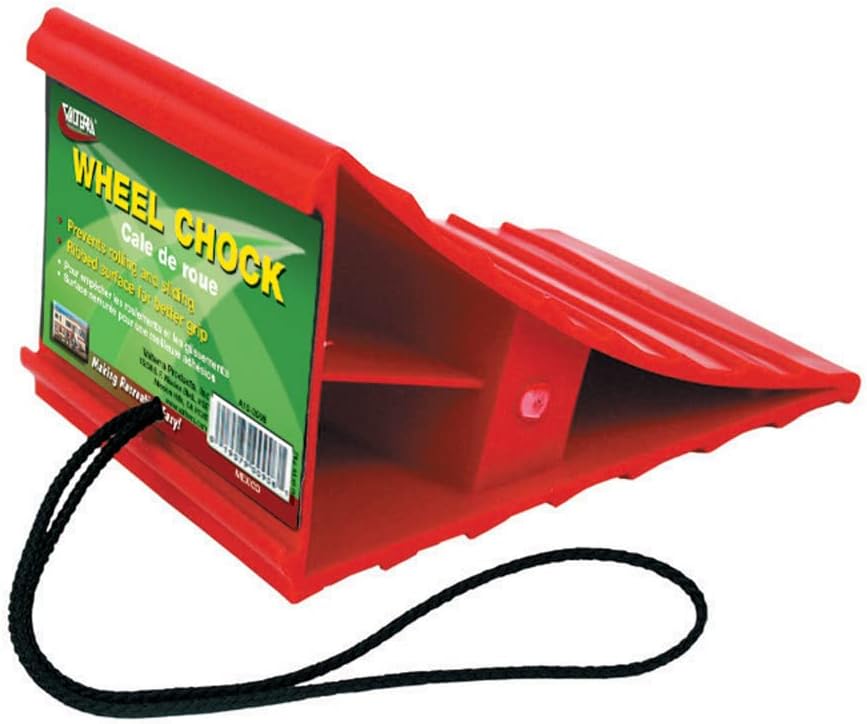
- Set the parking brake and use wheel chocks before lifting the vehicle.
- Support the car with jack stands on solid, level ground; never rely on a jack alone.
- Keep a fire extinguisher rated for flammable liquids nearby if you have one.
Signs the Fuel Tank May Be Damaged or Leaking
Before crawling under the vehicle, note the symptoms that led you here. They often point toward the area that deserves the closest inspection. A fuel tank leak can mimic a line leak, EVAP issue, or even fuel spilled during refueling, so context matters.
- A persistent raw gasoline smell around the rear of the vehicle or after parking.
- Visible wet spots or drips under the area where the tank sits.
- Fuel mileage that suddenly drops without another obvious cause.
- A check engine light related to the EVAP system, especially after refueling.
- Fuel smell strongest near the filler door, filler neck, or rear wheel area.
- Recent impact with road debris, a curb, or off-road obstacle.
If the smell occurs only right after topping off the tank, suspect the filler neck, cap seal, vent hoses, or top side of the tank rather than the bottom shell. If the smell is constant and the underside is wet, suspect tank damage, rust pinholes, or leaking line connections.
What Areas Need Inspection
A proper fuel tank inspection includes more than the tank body itself. Many apparent tank leaks actually come from hoses, the fuel pump lock ring, EVAP lines, or the filler neck. Inspect the entire system around the tank so you do not misdiagnose the source.
- Bottom and side walls of the tank for dents, gouges, rust, abrasion, and wetness.
- Seams on metal tanks or molded joints on plastic tanks for cracking or seepage.
- Fuel tank straps, strap pads, and mounting points for looseness or rubbing damage.
- Filler neck, filler hose, clamps, and the gas cap sealing area.
- Fuel supply, return, and EVAP vapor lines near the tank.
- Top of the tank around the fuel pump module if visible with a mirror or borescope.
How to Set Up the Vehicle for a Good Inspection
Start with a Ground-level Check
Park on a dry surface and look underneath before lifting the vehicle. Fresh fuel usually leaves a clear or slightly amber wet spot with a strong odor. If the surface under the car is already dirty or stained, slide a clean piece of cardboard under the tank area for a few minutes and check for new drops.
Lift Only if You Need Better Access
Many trucks and SUVs allow a decent inspection without lifting, but lower passenger cars often need more clearance. Raise the vehicle according to the owner’s manual or service lift points, then place it securely on jack stands. Chock the wheels that stay on the ground.
Use Light and Cleaning to Reveal the Source
Wipe dirty areas with a rag and, if needed, use mild soap and water on the outside of the tank and nearby lines. The goal is to remove mud and grime so you can tell old residue from fresh fuel. Do not use a grinder, wire wheel, or anything that can create sparks.
Tools That Make This Job Easier


Step-by-Step Fuel Tank Inspection Procedure
Inspect the Tank Body
Shine a bright light across the bottom and sides of the tank. Look for wet streaks, shiny patches, dirt stuck to damp areas, and fuel trails that run backward from airflow while driving. On a metal tank, pay special attention to rust blisters, scaling, and areas where undercoating has lifted. On a plastic tank, look for cracks, punctures, gouges, or abrasion from contact with a strap or shield.
A shallow dent without seepage may not mean the tank is leaking, but a deep dent near a seam, pump opening, or internal baffle area is a concern. If the dent has a sharp crease or the tank is scraped thin from impact, treat it as a fail even if it is dry at the moment.
Check Tank Straps and Mounting Points
Fuel tanks are usually held up by steel straps. Inspect them for rust, looseness, bent hardware, broken insulator pads, or signs that the tank has shifted. If a strap is loose or a pad is missing, the tank can rub against metal brackets and eventually wear through.
Any strap that is heavily rusted, cracked, or separating from its mount should be considered unsafe. A leaking tank and a loose support strap are a bad combination because movement increases stress on hoses and fittings.
Inspect the Filler Neck and Cap Area
Open the fuel door and inspect the cap seal, the cap threads or locking tabs, and the filler neck opening. Rust around the neck, torn rubber seals, and damage where the cap seats can all trigger fuel odors or EVAP faults. Then follow the filler neck down toward the tank if visible, checking for rust holes, cracked rubber filler hose sections, and loose clamps.
This area often leaks only when the tank is full or when the vehicle is parked on a slope. If your smell happens right after a fill-up, the filler neck and vent hoses deserve extra attention.
Check Fuel and Vapor Lines Near the Tank
Trace the lines entering and leaving the tank. Look for cracked rubber hose, corroded metal lines, damp quick-connect fittings, and broken plastic vapor lines. Fuel leaks may be active on the pressure side only when the key is turned on, while EVAP leaks may only vent fumes and leave little or no liquid trace.
Use an inspection mirror to look above the front edge of the tank and around the line connections if direct access is poor. A damp fitting or stain ring around a connector is a clue that the tank may not be the real problem.
Look at the Top of the Tank if Possible
Some of the most common leaks happen on top of the tank, especially around the fuel pump module, lock ring, rollover valves, and vent fittings. This area is hard to see with the tank installed, but you may be able to view part of it with a mirror from the side. On some vehicles, removing a rear seat or trunk access panel allows inspection of the pump module from above.
If you find dampness running down the tank but the bottom shell looks intact, the actual leak may be from the top. That usually means tank removal is needed for confirmation and repair.
How to Tell Fresh Fuel From Old Residue
Road grime, oil mist, and old stains can make diagnosis tricky. Fresh gasoline usually feels thin, evaporates quickly, and has an unmistakable sharp odor. Old residue is often sticky, dusty, or dry around the edges.
A simple DIY approach is to clean the suspicious area, let it dry, then recheck after the vehicle sits for a while or after a short drive. If new wetness appears in the same place, you have identified an active leak path. If the area stays dry but the smell continues, focus on the top side of the tank, EVAP components, and the filler area.
Do not sniff closely under the vehicle or use your face to locate the source. Let the odor come to you while you work at a safe distance.
Recommended Tools for This Job


Pass or Fail: What Damage Is Acceptable and What Is Not
Usually Acceptable to Monitor
- Light surface rust on straps or a metal tank with no scaling, flaking, or seepage.
- Minor cosmetic dents that are shallow, dry, and away from seams or fittings.
- Dusty stains that do not return after cleaning and rechecking.
Fail and Repair Soon
- Loose or rust-weakened straps, missing insulators, or evidence the tank is rubbing.
- Cracked filler hoses, rusty filler necks, or a damaged gas cap seal.
- Damp line fittings, corroded line sections, or recurring EVAP smell near the tank.
Do Not Drive Until Repaired
- Any active drip, seep, or spray of liquid fuel.
- Rust perforation, pinholes, or soft flaking metal on the tank shell.
- Cracks, punctures, or abrasion wear-through on a plastic tank.
- Severe impact damage near seams, the pump module area, or hose connections.
Fuel tank leaks are not a wait-and-see problem once liquid fuel is escaping. Even a slow drip can ignite from hot exhaust parts or static discharge, and it will only get worse with vibration and temperature changes.
Common Misdiagnoses to Avoid
Many DIYers assume the tank is leaking when the problem is actually somewhere else nearby. Taking a few extra minutes to inspect the surrounding parts can save you from replacing an expensive tank unnecessarily.
- Fuel spilled during filling can leave a temporary smell that fades after driving.
- A bad gas cap can set EVAP codes and fuel odor complaints without any tank damage.
- Leaking fuel lines can drip onto the tank and make it look like the shell is leaking.
- A fuel pump seal on top of the tank can send fuel down the sides of an otherwise good tank.
- Rusty tank straps can look alarming, but the actual leak may be from the filler neck.
What to Do After the Inspection
If the tank and nearby components are dry and intact, document what you found and keep monitoring the area. It helps to take clear photos so you can compare them later. If the smell returns only under certain conditions, note whether the tank was full, the vehicle was parked nose-up or nose-down, or the weather was especially hot.
If you found a problem with the fuel cap, filler hose, or an accessible line connection, those are often more practical DIY repairs than tank replacement. If the leak is from the tank shell itself or from the top of the tank, the repair usually involves lowering the tank and safely dealing with fuel and vapor exposure.
Avoid temporary patches unless they are explicitly fuel-safe and intended for that exact tank material, and even then treat them as a short-term emergency measure at best. Many general-purpose epoxies and sealers do not hold up long-term against gasoline and ethanol blends.
When to Call a Professional
A professional inspection is the smart move if the leak source is on top of the tank, the tank must be dropped, corrosion is severe, or the vehicle uses shields or exhaust routing that make access difficult. Shops also have safer ways to handle fuel removal, smoke testing for EVAP faults, and replacement of rusted hardware that may break during disassembly.
You should also hand the job off if you see active fuel dripping near the exhaust, smell fuel strongly inside the cabin, or are not fully confident lifting the vehicle and working underneath it. This is one system where caution matters more than saving an hour in the garage.
Key Takeaways
- Inspect not just the tank shell, but also the straps, filler neck, cap seal, top-side pump area, and nearby fuel and vapor lines.
- Any active liquid fuel leak, rust perforation, plastic crack, or severe impact damage means the vehicle should not be driven until repaired.
- Clean suspicious areas and recheck them to separate fresh leaks from old stains or spilled fuel residue.
- Fuel smells that happen mainly after refueling often point to the filler neck, vent hoses, cap, or top of the tank rather than the bottom shell.
- If the source is hidden on top of the tank or the tank must be lowered, professional service is usually the safest choice.
FAQ
Can I Drive with a Small Fuel Tank Leak?
No. If liquid fuel is actively leaking, even slowly, the vehicle should not be driven until the issue is repaired. Gasoline vapors and drips create a serious fire risk.
How Can I Tell if the Smell Is From the Tank or Just Spilled Gas?
Clean the area, let it dry, and monitor it after the vehicle sits or after a short drive. Spilled fuel usually fades, while an active leak or vent problem comes back in the same area.
Do Plastic Fuel Tanks Crack Often?
Plastic tanks resist rust well, but they can crack from impact, abrasion, or stress around fittings and seams. They are less likely to rust through than metal tanks but still need careful inspection.
What if I Only Smell Fuel After Filling the Tank Completely?
That often points to the filler neck, filler hose, vent hose, cap seal, or a leak on the top side of the tank. These problems may only show up when fuel level is high.
Will a Bad Gas Cap Make It Seem Like the Fuel Tank Is Leaking?
Yes. A bad cap can allow vapor to escape, trigger EVAP codes, and cause fuel odor without any hole in the tank itself. Always inspect the cap and sealing surface first.
Can I Patch a Leaking Fuel Tank Myself?
Temporary patching is not ideal and many general sealers fail when exposed to gasoline. If the tank shell is cracked, punctured, or rusted through, proper repair or replacement is the safer solution.
Do I Need to Remove the Tank to Inspect It Properly?
Not always. You can often find obvious damage, wetness, rust, bad straps, or filler neck issues with the tank installed. But leaks from the top of the tank often require partial access or full tank removal to confirm.
Need Parts for This Repair?
The right parts and supplies vary by vehicle.
Select your make and model to find compatible parts and accessories for your car.
Exact Fit
Parts that fit your make and model
Quality You Can Trust
Top brands and OEM quality options
Fast Shipping
Get the parts you need, delivered fast