

Note: This article contains affiliate links. If you click on these links and make a purchase, I may earn a small commission at no extra cost to you. This helps support my research and content. Read my full affiliate disclosure here.
What You’ll Need
A quick look at the tools and supplies commonly used for this job.
Tools
- Clean flashlight
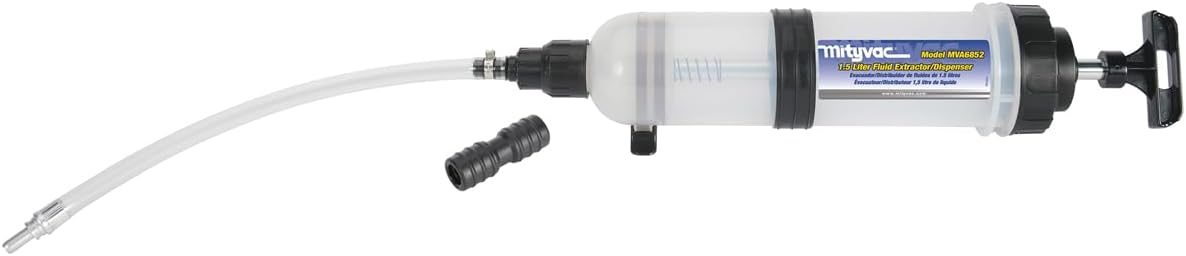
- Turkey baster or fluid transfer tool for sampling
- Safety glasses
- Nitrile gloves
- Brake fluid test strips
- Electronic brake fluid tester
- Clean white paper towel or lint-free cloth
Parts & Supplies
- Correct brake fluid type for your vehicle
- Distilled water for cleanup only
- Shop towels
This article is part of our Brake System Maintenance & Repair Guides.
Testing brake fluid is one of the simplest brake system checks a DIY owner can do, and it tells you a lot about safety, maintenance timing, and possible internal system wear. Brake fluid does not last forever. Over time it absorbs moisture, darkens from heat and use, and can become contaminated enough to reduce braking performance.
A proper test is more than just looking at the fluid level in the reservoir. You also want to check the fluid’s color, clarity, moisture content, and whether there are signs of rubber breakdown or metal contamination. Those clues help you decide if the fluid is still serviceable, if a brake fluid flush is overdue, or if a larger brake system inspection is needed.
This guide walks you through safe at-home checks, what your results mean, and when to stop driving and service the system right away.
What Brake Fluid Testing Can Tell You
Brake fluid transfers force from the pedal to the calipers or wheel cylinders. To do that safely, it needs to stay clean, stable under heat, and free of excessive water contamination. When brake fluid degrades, its boiling point drops and internal corrosion risk increases.
A basic brake fluid test can help you identify whether the fluid is low, old, moisture-saturated, contaminated, or possibly affected by a component problem such as a worn master cylinder or deteriorating rubber seals.
- Low fluid may point to pad wear, a leak, or recent brake work.
- Dark or cloudy fluid often suggests age, heat cycling, or contamination.
- High moisture content means the fluid’s boiling point has dropped and a flush is usually needed.
- Debris or oily separation can indicate internal component deterioration or the wrong fluid was added.
Safety Before You Start
Brake fluid can damage paint, irritate skin, and absorb moisture from the air quickly. Work on a cool vehicle parked on level ground with the engine off. Do not leave the reservoir open longer than necessary.
- Wear gloves and eye protection.
- Keep brake fluid off painted surfaces; if spilled, rinse immediately with plenty of water.
- Use only the brake fluid type specified on the reservoir cap or in the owner’s manual.
- Never mix in power steering fluid, engine oil, transmission fluid, or any unknown liquid.
- Do not drive the vehicle if the pedal feels soft, sinks, or if you suspect an active leak.
Know Your Brake Fluid Type
Before testing, confirm what type of fluid your vehicle uses. Most passenger vehicles in the U.S. use DOT 3, DOT 4, or sometimes DOT 5.1. These are glycol-based fluids that absorb moisture over time. DOT 5 is silicone-based and is not interchangeable with most other systems.
Why this matters: some testers are calibrated for glycol-based fluids only, and adding the wrong fluid can damage seals and cause expensive brake failure. Read the reservoir cap first, then verify in the owner’s manual if needed.
- DOT 3: common in many older and economy vehicles.
- DOT 4: common in newer vehicles and performance applications.
- DOT 5.1: glycol-based, higher performance in some applications.
- DOT 5: silicone-based, uncommon in standard passenger cars and usually not mixable with DOT 3 or DOT 4.
Where to Inspect the Fluid
The main inspection point is the brake master cylinder reservoir, usually mounted high on the driver’s side of the engine bay near the firewall. Most modern reservoirs are translucent, so you can often see the level from the outside without opening the cap.
If you need to open it for a closer look or a sample, clean the cap and surrounding area first. Dirt that falls into the reservoir can contaminate the system.
Initial Visual Checks
Check the Fluid Level
Look for the MIN and MAX marks on the side of the reservoir. The fluid should normally be near the upper mark, though a slight drop as brake pads wear is common. A level below MIN needs attention before anything else.
Low fluid does not automatically mean you should top it off and move on. If the level has fallen noticeably, inspect the brake system for worn pads, caliper leaks, brake hose seepage, wheel cylinder leaks, and a leaking master cylinder.
Check Color and Clarity
Fresh brake fluid is usually clear to light amber. Older fluid often turns medium brown over time. Very dark fluid, cloudy fluid, or fluid with visible particles deserves closer evaluation and usually indicates service is due.
- Clear to light amber: usually normal if moisture content is also acceptable.
- Medium brown: aging fluid; consider testing moisture and checking service history.
- Dark brown or black: usually overdue for a flush and possible internal wear.
- Cloudy or milky: contamination or moisture issue.
- Specks or sediment: possible corrosion, rubber deterioration, or dirty service practices.
Smell and Consistency
Brake fluid should feel slick but not gritty. If a small sample on a white towel shows particles, sludge, or obvious separation, the fluid is contaminated. A burnt odor can also point to heat-stressed fluid.
Tools That Make This Job Easier


How to Test Brake Fluid Moisture Content
Moisture content is the most useful at-home measurement because glycol-based brake fluid absorbs water from the air. As moisture rises, wet boiling point drops. Under hard braking, overheated fluid can form vapor, causing a soft or fading pedal.
Using Brake Fluid Test Strips
Test strips are affordable and simple. Open the reservoir only after cleaning around the cap. Dip the strip according to the manufacturer’s instructions, wait the specified time, then compare the color to the chart.
- Clean the reservoir cap and area around it.
- Open the cap carefully and avoid dropping dirt into the fluid.
- Dip the strip for the exact time listed on the package.
- Wait for the reaction time to finish.
- Compare the strip color to the moisture or copper-content scale.
Many strips measure moisture indirectly or assess copper contamination, which can indicate corrosion inhibitor depletion. Follow the packaging exactly because timing errors can skew the result.
Using an Electronic Brake Fluid Tester
Electronic testers are quicker and reusable, but quality varies. Use one that is compatible with the fluid type in your vehicle. Insert the probe into the reservoir or a clean sample and wait for the reading to stabilize.
Many handheld testers display a simple good/fair/replace result or a percent moisture reading. They are best used as a screening tool rather than as laboratory-grade proof.
General Moisture Result Guidelines
- Below about 1% moisture: generally good.
- Around 2% moisture: aging fluid; check maintenance interval and vehicle use.
- 3% or more moisture: brake fluid flush is usually recommended soon.
- If test results are inconsistent, retest with a fresh strip or a known-good tester before making a decision.
How to Take a Clean Fluid Sample
If the reservoir is hard to see into, take a small sample from the top of the reservoir with a clean fluid transfer tool or turkey baster used only for brake fluid. Do not use a tool that has touched oil or other automotive fluids.
Place a drop on a white paper towel or in a clean clear container. This makes it easier to spot discoloration, suspended particles, or water contamination. If the sample looks bad, do not return it to the reservoir.
- Use only very clean tools.
- Take a small amount from the top for inspection, not a large quantity.
- Avoid exposing the reservoir to open air longer than necessary.
- Never pour old sampled fluid back into the brake system.
Signs the Brake Fluid Is Contaminated
Not all bad brake fluid simply looks dark. Some contamination points to a larger problem that a fluid flush alone may not fix.
- Cloudy or milky fluid can mean water contamination.
- Black rubber-like debris may indicate seal or hose deterioration.
- Metallic particles can suggest internal corrosion or component wear.
- An oily rainbow film or separated layers can mean the wrong fluid was added.
- Heavy sludge in the reservoir may point to neglected service or severe internal breakdown.
If you see oily contamination or thick sludge, avoid driving until the system is properly inspected. Petroleum-based contamination can ruin seals throughout the brake system.
Recommended Tools for This Job


Brake Symptoms That Support Your Test Results
Fluid condition should always be considered together with brake feel and vehicle behavior. Even fluid that looks only moderately old can be unsafe if the system is showing performance problems.
- Soft or spongy pedal: may indicate moisture, air in the system, or a leak.
- Pedal slowly sinks under steady pressure: possible master cylinder bypass or leak.
- Brake fade after repeated stops: fluid may be overheated or moisture-contaminated.
- ABS or brake warning light: diagnose the full braking system, not just the fluid.
- Uneven braking or pulling: may involve calipers, hoses, or contaminated components.
If the pedal is noticeably abnormal, treat that as a more urgent issue than the test strip result alone.
How to Interpret Your Results
When the Fluid Is Likely Okay
If the level is normal, the fluid is clear to light amber, and moisture content is low, your brake fluid is likely still serviceable. Keep following the maintenance schedule in the owner’s manual and recheck during routine brake inspections.
When a Brake Fluid Flush Is Due
If the fluid is dark, moisture content is elevated, or service history is unknown, a flush is usually the right next step. Many manufacturers recommend brake fluid replacement every 2 to 3 years, though intervals vary.
When to Suspect a Bigger Brake System Problem
If fluid level keeps dropping, the pedal feels wrong, or the sample shows debris, sludge, or oily contamination, inspect the full system. That may include the master cylinder, brake lines, hoses, calipers, wheel cylinders, and ABS hydraulic unit.
Common Mistakes to Avoid
- Judging brake fluid only by color without checking moisture or service history.
- Opening a dirty reservoir and letting contamination fall inside.
- Topping off low fluid without checking for worn pads or leaks.
- Using the wrong fluid type or mixing incompatible fluids.
- Testing with dirty tools that can contaminate the sample.
- Ignoring a soft pedal because the reservoir still looks full.
What to Do Next If the Fluid Fails the Test
If your testing suggests old or moisture-saturated brake fluid, schedule a brake fluid flush soon. A proper flush replaces old fluid throughout the hydraulic system, not just the fluid in the reservoir. Simply sucking old fluid out of the reservoir and refilling it is not the same as a full service.
If you also have low fluid, a warning light, visible leaks, or poor pedal feel, inspect and repair those issues before or during the flush. Fluid replacement cannot correct worn pads, leaking components, or trapped air by itself.
- Flush the system if moisture is high or the fluid is badly discolored.
- Inspect pads and rotors if fluid level is low.
- Check all calipers, hoses, hard lines, and the master cylinder for leaks.
- Bleed the system correctly after any repair that opens the hydraulic circuit.
- Road-test carefully in a safe area only after firm pedal feel is confirmed.
When to Stop Driving and Get Immediate Service
Do not delay professional diagnosis if any of these conditions are present. Brake failure risk is too high for a wait-and-see approach.
- Brake pedal goes to the floor or nearly to the floor.
- Pedal suddenly becomes soft after feeling normal.
- Brake warning light stays on with poor braking performance.
- Reservoir is empty or fluid level keeps dropping.
- You see fluid leaking near a wheel, under the master cylinder, or along brake lines.
- Fluid appears contaminated with oil or heavy sludge.
Key Takeaways
- Test brake fluid by checking level, color, clarity, and moisture content rather than relying on appearance alone.
- A low reservoir can mean worn pads or a leak, so do not simply top it off without inspecting the brake system.
- Moisture readings around 3% or higher usually mean a brake fluid flush should be scheduled soon.
- Cloudy fluid, debris, oily separation, or a soft pedal can indicate a larger hydraulic problem that needs immediate attention.
- Always use the exact brake fluid type specified for your vehicle and keep the reservoir open only as long as necessary.
FAQ
Can I Tell if Brake Fluid Is Bad Just by Looking at It?
Not always. Dark fluid can suggest age, but color alone does not measure moisture content. Fluid that still looks acceptable may already have absorbed enough water to need replacement, so a test strip or electronic tester is more useful.
How Often Should Brake Fluid Be Tested?
A practical DIY interval is about once a year, or any time you inspect brakes, notice a change in pedal feel, buy a used vehicle, or are unsure when the fluid was last replaced.
What Moisture Level Means Brake Fluid Should Be Replaced?
Many DIY guidelines treat about 3% moisture or higher as a strong sign the fluid should be flushed. Some vehicles and driving conditions justify replacing it sooner, so always consider the service schedule and how the brakes feel.
Why Is My Brake Fluid Low if I Do Not See a Leak?
As brake pads wear, caliper pistons extend farther and fluid level in the reservoir can gradually drop. That said, low fluid can also mean a leak, so inspect pads, calipers, hoses, lines, wheel cylinders, and the master cylinder before assuming it is normal.
Can I Top Off Brake Fluid Instead of Flushing It?
Topping off only restores level. It does not remove moisture, contamination, or degraded fluid from the rest of the system. If testing shows the fluid is old or contaminated, a complete flush is the correct fix.
What Happens if the Wrong Brake Fluid Was Added?
Using the wrong fluid can swell or damage seals, contaminate the hydraulic system, and lead to brake failure. If you suspect the wrong fluid was added, do not continue driving until the system is inspected and corrected.
Is Dark Brake Fluid Always Dangerous?
Not automatically, but it is a warning sign. Some fluid darkens gradually with age and heat. If it is very dark, cloudy, or contains debris, or if the test shows high moisture, service is recommended.
Can I Test Brake Fluid Without Opening the Reservoir?
You can check level and some color change through a translucent reservoir, but you usually need to open it briefly to take a sample or use a test strip or probe. Clean the cap area first and minimize how long the reservoir stays open.
Need Parts for This Repair?
The right parts and supplies vary by vehicle.
Select your make and model to find compatible parts and accessories for your car.
Exact Fit
Parts that fit your make and model
Quality You Can Trust
Top brands and OEM quality options
Fast Shipping
Get the parts you need, delivered fast